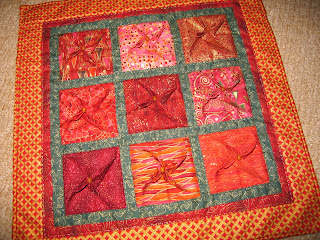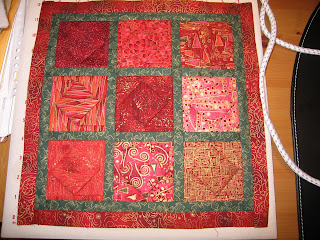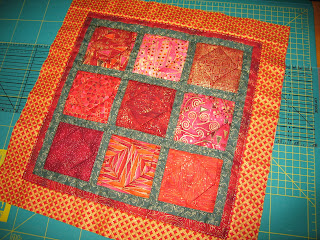
I came up with name after creating the first 3D star block and thinking it reminded me of star anise.

 For this 15 inch quilt, you will need the following:
Cutting mat, ruler and rotary cutter
9 fabrics for the 3D star blocks
3 fabrics for the borders
Quilt thread and large beads

Cut one six inch square from each of the nine fabrics choosen for the 3d star blocks.

Fold the block in half and iron only the ends of the fabric.
 The block will look like above photo once all four ends are ironed. Be careful not to iron all the way across so as not to have a crease in the star at a later stage.
Measure from the ironed fold 1-1/4 inches from to the right and place a pin.

Fold the fabric where the pin is placed back in harmonica style as shown lining up the fabric edge and bringing the ironed fold forward. This will give you a edge by the corner of the square of approximately 3/8 to 1/2-inch (see right corner of photo)


Pin these folds in place. Be sure to leave the center of the fabric loose.

Once all four folds are in place, sit the block down on an ironing pad with the four corners straight and the center mound of fabric upwards.

Here is the fun and magical bit! Just tap the fabric mound and it will flatten on its on to form a diagonal square on the folded square. This square in the center will measure approximately 1-3/8 inch.
 Iron this down flat.
 The back of your block will look like this.
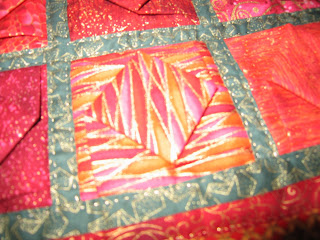
 The front like this. I will refer to this portion I am holding up as the fabric square later when we create the 3D effect. This block now measures 3-1/2 inch.
 Cut 6 strips - 3-1/2 inch x 1 inch from your first border fabric (I choose green).
 Sew these strips to the blocks forming 3 rows of 3 blocks.
 Cut 4 strips of fabric - 10-1/2 inches x 1 inch from this same border fabric.
 Sew these strips between the three rows being careful to match the cross seams as shown in the previous photo. Once you remove the pins from the folded blocks, you will have give to pin the row of blocks easily to fit the strip.

Cut 2 strips - 11-1/2 inch x 1 inch from the same border fabric. These strips will be sewn along the top and bottom completing the square.
 Cut 2 strips - 11-1/2 inch x 1 inch from the second border fabric. I choose a dark red. Sew these strips along the two sides.
Cut 2 strips - 12-1/2 inch x 1 inch from the same border fabric. Sew these strips along the top and bottom edge.
Cut 2 strips - 15-1/2 inch x 1-3/4 inch from the third border fabric. Sew these strips along the top and bottom.

On to part two which is creating the 3D star effect.


12 comments:
Very cute and there is NOOOO WAY in this whole wide world I would ever attempt that.
Love you, Mom
Hi Heidi!! That looks great, not sure if I could do it though...LOL!
Thanks for popping in!
Hugs,
Robin
THANK YOU HEIDI!! This is a beautiful little quilt. Your fabrics are awesome and a perfect choice. I love this quilt so much I will be starting it very soon. Thanks again for the wonderful tutorial.
Hugs
How cool is that! Thanks for sharing.
Hi Heidi, This is a beautiful piece! I love your fabric choices, such rich colors. Excellent tutorial...but this is just a tad to complicated for me.
Ciao Heidi! Just came back from holiday and am catching up on email and blogs. This is a wonderful tutorial, and your little quilt is one that would absolutely bring lots of Christmas cheer! As soon as I get back on track, I'll be playing with this block!
Heidi, what a beautiful quilt! And thanks for the tutorial. It's so easy to follow but I'm not sure if I could do this block. But it looks fantastic!
I will refer back to this excellent tutorial after the kids are in school. ;)
Arghhh!!
Don't tell me, you want to do that as a project on the quilt group... Please, please, pretty please???
I will make a mess of it, and get it up side down inside out.
But love the result, so maybe you make one for me, yes?!
I orderd the book for the blocks, and i made 5 so far. really love to make them.
I will bring them over next week.
Hugs from me and Rover
Saskia
By the way, read my blog, all hell broke lose on my road to buy another house...
Wow that is amazing. I'm just not that talented or patient!
The colours are Beautiful!!!!!
Beautiful quilt! Thanks for the details.
Michele
Hello, dear Heidi! I've spent some time catching up with you through your blog, as it's been a while since I've had time and/or felt well enough to get back to my friends' blogs! I love your Christmas quilt and so many of your beautiful works. You're so good to take the time to share every detail of making this one with everybody. Be back to see you soon! Hugs, Deb
Post a Comment